Friday, June 30, 2017

Internet tips

You know how you see those videos on Facebook or elsewhere on the internet that tell you they have some kind of amazing kitchen or food prep hacks that will change your life?
Or maybe they say you've been doing certain things wrong all your life?
Yeah, I confess to watching some of those.
Occasionally I think, "That's dumb"
Or sometimes I think, "I already do that! I'm so awesome. Obviously!"
Or perhaps, "Hmmm maybe I'll try that one day"

Well one such hack that I saw was to de-stem a strawberry using a straw.
I though it was dumb.
Yes, you save some of the strawberry by not using a knife (although in their video, the idiot who is cutting off the stem cuts the strawberry nearly in half), but it looked like a hassle.
Plus, will a straw really hold up over time? They aren't that strong.
And I don't keep straws around the house.


But this week I had the opportunity to de-stem 16 pound of strawberries and I thought that perhaps this was a good time to try out the straw idea.  I realized that I had some heavy duty straws that came with some reusable cups.  You know, the cups that seem to proliferate in your cupboards and drive you nuts because when you actually want to use one you can't find the lid or the straw that goes with it?  yeah those.

Anyway, it works!


It's pretty darn easy and smooth.  I do recommend the heavy duty straw but only because that is what I used and it worked well and never wore out or bent or anything.  Maybe a normal straw would be just as good...

If you aim just right from the bottom of the strawberry, the top just pops right off.
If your aim is off a bit, maybe only part of the top will pop off, leaving a few leaves still sitting there.  The good news is that its super easy to just reposition with the straw still inside the strawberry and pop the rest of the leaves right off. Or grab them with your fingers and pull them off if you feel so inclined.

I did have a couple of times that I was close but not quite centered and it left a tiny bit of the core there.  I just left it.  As long as the leaves were gone, I figured it was edible.


I'm actually quite impressed with myself for trying something I saw online.
Now I have another good use for those straws even if I lose the cup or the lid!
Win-Win!

Also, we had some amazing strawberry shortcake. Oh yeah.

Monday, June 26, 2017

We did something crazy


Here is a view of our lovely backyard.
It has lots of trees...5 trees in this small yard and that's after one of them died and we had to cut it down.

Lately Frank has been saying things like
"what do you think, should we cut down the maple tree?"
My usual response is something along the lines of
"If you really want to I guess, but I'd rather cut down the apple tree"

The apple tree is a red delicious apple tree.  Not my favorite.
It's huge and the apples are wormy.
It has some signs of disease and we lost one whole section of the tree last year so I figure it's days are numbered anyway.
We spend untold numbers of hours every year picking up rotten apples or semi-rotten apples off the ground.
It's backbreaking and pointless work.

The maple tree is a huge tree, way bigger than the apple.
It has a few dead branches that concern us but overall it's a pretty tree.
The only real issue with the tree is that it shades the entire back part of the yard where Frank's garden is.

And so, "we" decided to cut them both down.


We had to get professionals because the trees were so big and right by the shed (maple) and the fence (apple)


There were 3 guys and they worked hard for several hours.


The yard now looks...sunny.

That's about all the positive I can say because it looked way better before.
After they cut down the maple I came outside to tell them that I had changed my mind!
Too late of course.


We now have a much clearer view of the neighbors so that's not awesome
but Frank's garden is in full sun.
If the garden survives the shock of suddenly being in full sun, we should have lots of produce this year.


We do have a long term plan.
We will be planting at least two new trees.
One dwarf peach tree and one new maple or sycamore.
The new maple will be in the back corner where Frank's garden is now so that when it grows, it will give us the shady look we like and hide the neighbors somewhat but without shading the garden.
We will move the garden over by the shed, where the old maple used to be.

It's a good plan and will look nice someday...but it will be a long while before the new maple is big like the old one was.
I hope we are still alive to see it.

Sunday, June 25, 2017

Dad

I'm so bad at updating my blog lately.
I have some old things that I need to write up so I don't forget though:
trip to Alaska
hmmm...I think I already forgot all of the other things because I was planning to put a big list and all I could come up with was "trip to Alaska"

My Dad turned 82 this week!
He's still the same.  I don't feel like he seems older to me.
He might forget some stuff and he's pretty anti-technology in general
but he's still the same guy he's always been.
He loves to drive and will drive up to Logan for the day (a 2 hour one way trip) just for fun.
He still tells great stories.
He still makes a killer fruit salad.
He regularly washes and waxes his cars as well as a neighbors car while he's at it.
He is still full of energy!

He and Mom live a pretty simple life nowadays.
They walk for an hour every morning.
Dad makes a lot of steamed veggies and stuff like that for meals.
They eat out a couple of times a week, usually one lunch is with me most weeks.

He jokes that they sometimes go walking up at the outlets but they have to go early before the stores open or they are in trouble.
He showed up to his birthday dinner sporting a new hat and both he and mom had new shoes.
He said, "We went walking at the outlets today but we got a late start and they were open." 
Ha!

I didn't think he looked happy in this first picture so I made him retake it.
He told me it's all about the angle of the hat whether you look happy or not.


My Dad takes good care of my mom who has dementia.

She does pretty well overall but has lately become a bit more paranoid
which makes her harder to "handle" (for lack of a better word)
When she gets an idea in her head she gets in a bit of a loop and it's hard to move her to a new subject.
She is very repetitive.

It's all quite hard but Dad is generally very patient and kind to mom.
He spends most of his time thinking about what to do for her to make her comfortable or help her be more healthy.
He encourages her to do things on her own that she can do.
He helps her stay busy with little projects or hobbies.
They go for long drives partially because mom does so well in the car, just enjoying the drive.

I can see that it is taking a toll on him though.
I think about it a lot and I'm trying to come up with plans for being more helpful to him.
Plus, anytime I spend with mom we always end up watching a chick flick, which I am happy to do.

Win-Win!

Wednesday, June 14, 2017

House projects revisited

In between coats of paint  on the cabinets
(when it was drying)
I started working on the walls as well.
I removed the big cork board that was on the wall, patched holes and started the cutting in.


I informed Frank that I couldn't finish the painting until he moved the sconce lights by the couch...this is the bad part of having the kitchen, eating area and family all in one connected space.

So, he accepted his fate and began the process of moving the lights.

The lights were originally placed oddly off-center to the room so I either wanted them gone completely (my preference) or moved over to be on either side of the couch.

Frank wanted to keep them for reading light so he was stuck with the project.


It took a few days with all of the repair that had to be done


and then it was time to paint all of the walls!

We have this one huge wall that we weren't sure how to handle.
It is right over the stairway for the basement and the ceilings are high anyway
so all I could imagine was us rigging up some kind of ladder and someone falling to their death.

We ended up using a trim painter on a long pole.


It was not perfect.
But it is done and I'm just going to let it go.
I hope.

I had painted the hallway some time ago but I had some stains seeping through which was super annoying so I took this opportunity to prime over all of the spots on the wall with my super duper primer (the one I used on my cabinets) and then repaint the entire hallway


So, yeah.
That was fun.
But it's nice to have a non-spotted hallway now.

Now the kitchen, the family room, the wall over the stairway and the hallway are all painted.


And the lights are back up.

I ended up using the same lights we had before but I spray painted them, replaced the glass shades with new ones (smaller and not beige), and turned them the other direction.

Much better!


I still have a number of projects in my head to finish up the area but it's totally functional and would probably be considered "done" by most normal people.
As a matter of fact, once we got the lights back up Frank kept saying things like:
"Wow, the house looks great and it's ALL DONE!"
or
"I'm so happy that we've finished the house!"
or
"We are all done and never have to do another project in here!"

He's hoping that his enthusiasm will entice me to be done.  
But that's just silly.

Tuesday, June 13, 2017

The kitchen!

As I've been looking through the pictures for this blog post I feel totally overwhelmed.
No wonder it took me so long to start this project!
So buckle up, this is a long one.
(There are before and after pictures at the end of the post.  If you just want to see those, scroll down)

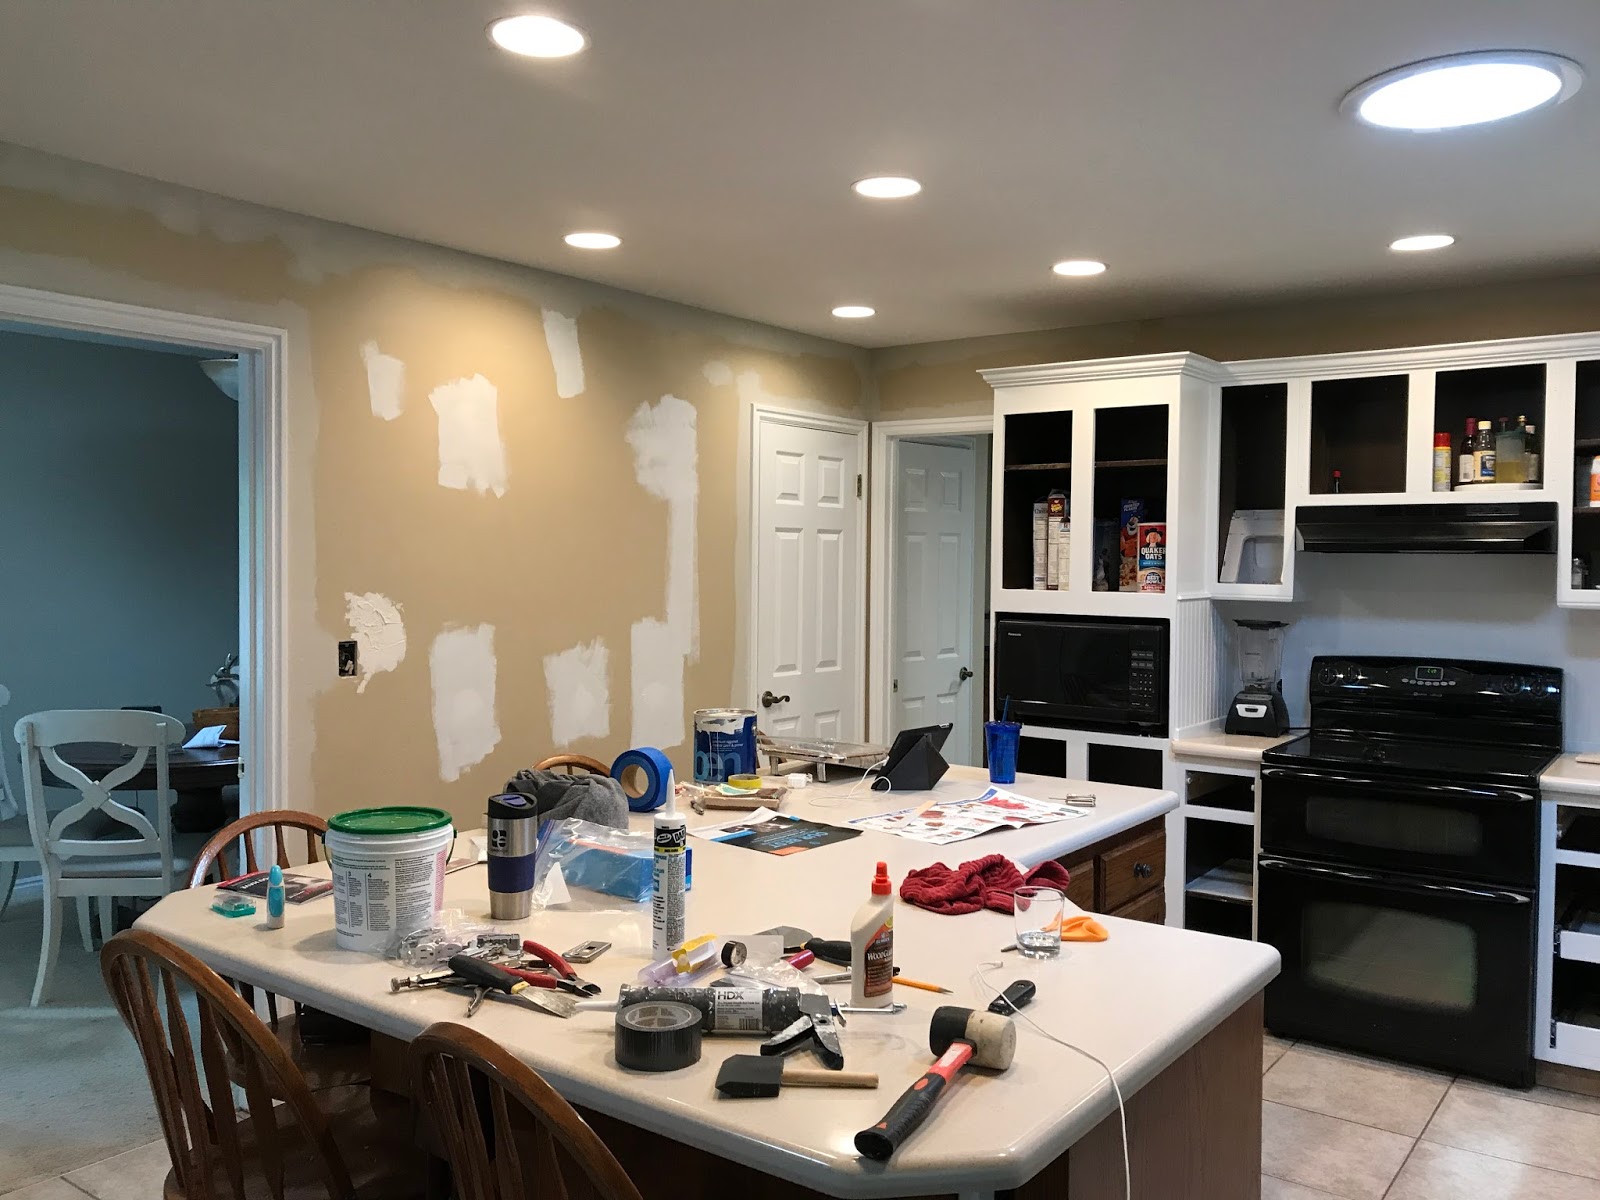
Here's what the kitchen looked like before I started:


Several cabinets were seriously water damaged.


I started with replacing the window (which was broken).
The window replacement required me to remove the tile in the window sill so that's when the dominoes started to fall.


New window getting installed!


We started removing the tile on the walls which led to removing the drywall.
Nothing is ever as easy as you think it will be!


Frank replaced the wallboard which turned out to be slightly more difficult than planned.
He had to fix the crazy wiring that we found behind the wall 
(which, I guess, is a good thing in the long term)


Look how pretty that new drywall looks!


He put up the new beadboard backsplash
which was, again, a pain.


Here's the trim work along the top of the backsplash.


And that's when Frank's work ended and my work began.

I took down all of the doors, labeled and stored all of the hinges, and started all of the sanding.
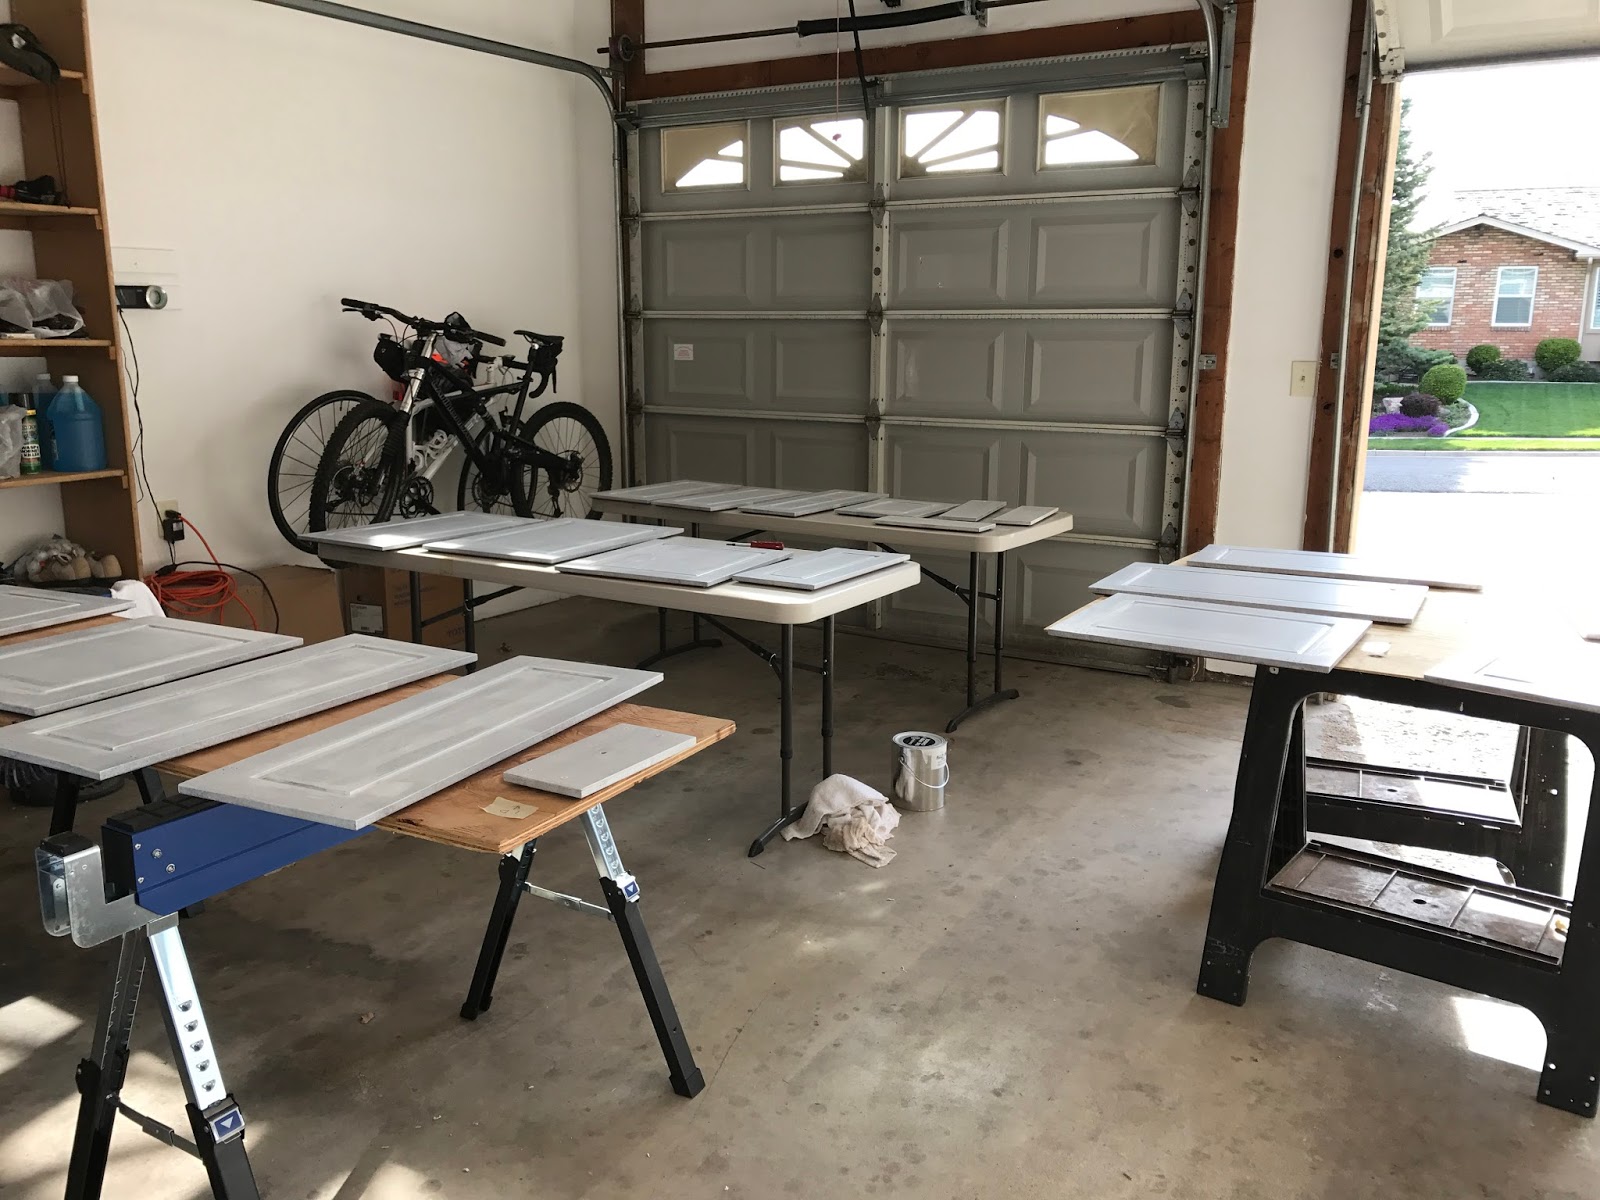
This was my garage for a long long time.


We set up tables and I put all of the doors all around with tape on the tables so I would know which door was which when I was done.
I read lots of blogs and articles online to find the best way to paint kitchen cabinets and there are lots of opinions and short cuts out there.
I decided that I would not do any short cuts.
I would do all of the necessary sanding and priming in an attempt to have a finished product that would last.


I went to my local paint store where the people seem to know their stuff and asked which primer would be best...
I used the primer that they recommended.
After TWO coats of the primer (with sanding in between) it was clear that the wood grain was still leaking through.
Seriously annoying.


So it was back to the paint store to talk to a different person who recommended a different primer.
He was like "oh you're doing cabinets? then you definitely need to use this"
I was like "I told the last guy I was doing cabinets!"
The first primer was apparently good but this one is a last resort for hard cases.
My recommendation? Start with the last resort and save yourself many hours of extra work!
Zinsser BIN is a shellac based primer and seals in the wood tannin.
It does stink so you have to take precautions when using it.


I also sanded the cabinet boxes inside the house.  
I used the rotary sander when possible but had to hand sand small areas and the top molding.

I managed to rig up a little connection for the sander to my vacuum which cut down on the dust considerably!


Even though I tried really hard to clean up each day, my kitchen was a disaster the whole time.
There were just tools everywhere and I had the drawers and items out of the cabinets in various rooms.
It was definitely a hassle.

Once everything was all primed, I started painting!


Using the right paint is key to get the best results.
In my case, I knew that the wood grain would still be somewhat visible.
If I had a professional do the painting, I could have had the grain filled in but it was more than I was willing to do.
I used Benjamin Moore Advanced paint
which is the same paint I used for my trim in the house.
It levels really well which is key for a nice finish.


I also painted the backsplash with the same primer and paint.

I used a satin sheen for the cabinets and backsplash and a semi-gloss for my house trim.


You have to wait 18 hours between coats for advance paint so there was always at least a day between coats...sometimes more because I had days where I just couldn't face the project.
Plus I had to sand between each coat.
I hate sanding!
I'm sure it's worth it in the end for smoother, tough finish.
(It's easier to say that now that I'm done)


After standing for hours in the garage painting the doors, I was in PAIN.
I have issues with pain anyway so standing on concrete and leaning over slightly for so long was really tough on my body.
Frank would be in the family room and I would be painting and moaning and groaning whenever I had to move to the next area...it's kind of funny now but at the time I couldn't believe how much my body hurt.


I was really happy with the finish after two coats!

More proof of the disaster that was my kitchen every single day:


Once I was done painting the cabinets, I picked out hardware and then began painting the hinges to match.


I really didn't want to buy new hinges!
As a reminder, this painting of the cabinets is, for me, a temporary fix until I can afford to redo the kitchen for real with new flooring and a new island.
So I really wanted to keep it as inexpensive as possible.

The upside to using current hinges: the doors will hang exactly how they did before. No guesswork on where to place new hinges.
The downside to using the current hinges: the doors will hang exactly how they did before.
ha!
I had some doors that didn't close perfectly before but I decided that I was willing to have some funky doors in exchange for saving the cost of new hinges.
Here is one of my slightly wonky doors

I was very careful to keep track of which hinges went to which doors!
I cleaned the hinges by putting them in the crockpot with a bit of dish soap and water for a few hours.  It really worked great and the gunk came right off.  The finish was dulled by this process as well so that little internet tip worked out well!


Labeling the table when it was time to paint, like I did with the doors, worked like a charm.


Once the hinges were all dry, it was time to put on the hardware and rehang the doors!
I found the knobs for the cabinets at a local hardware store and I found the pulls for the drawers at an online store.
I bought all of the knobs that the hardware store had in stock and then they ordered the rest for me, telling me they would be in in a few days. Yeah, it took a few weeks! ugh.  It's kind of a long story which I might tell in another post.
I was pretty excited to get the doors back on so I marked the first door and drilled a hole for the first knob.  So nerve wracking!


Aaaaaand...I screwed it up.


so after everything was FINALLY done, I had to fill, sand, prime and repaint part of that door. 
*sob*

After that I was very careful to mark every door and drawer perfectly and then Frank drilled them with the drill press.  That went better.

I spent a saturday putting on the hinges, rebuilding the drawers and putting them all back up on the wall.  It was pretty exciting, not gonna lie.  Even though I was missing a bunch of hardware, the kitchen felt done.


Here are some of the finishing touches that I did:

I had one of the hooks left that I put in the bathroom so I painted it a light chartreuse color and it will now hold my towels.


I installed a magnetic holder for my knives so that I don't have the big knife block on my counter anymore
(I never liked it)


as well as an under cabinet banana holder that folds up when no bananas are on it


And now for the grand moment....
the finished kitchen!


I didn't paint the island.  It is still stained wood.
I will someday replace it with a smaller island and I'll decide then whether to do wood or a painted surface.
The whole room is so much brighter and inviting.
I love it!

Before and After pictures: